Designing labels
Designing labels
Open a Plex label format, lay out its elements, and bind them to Plex data.
Find a label
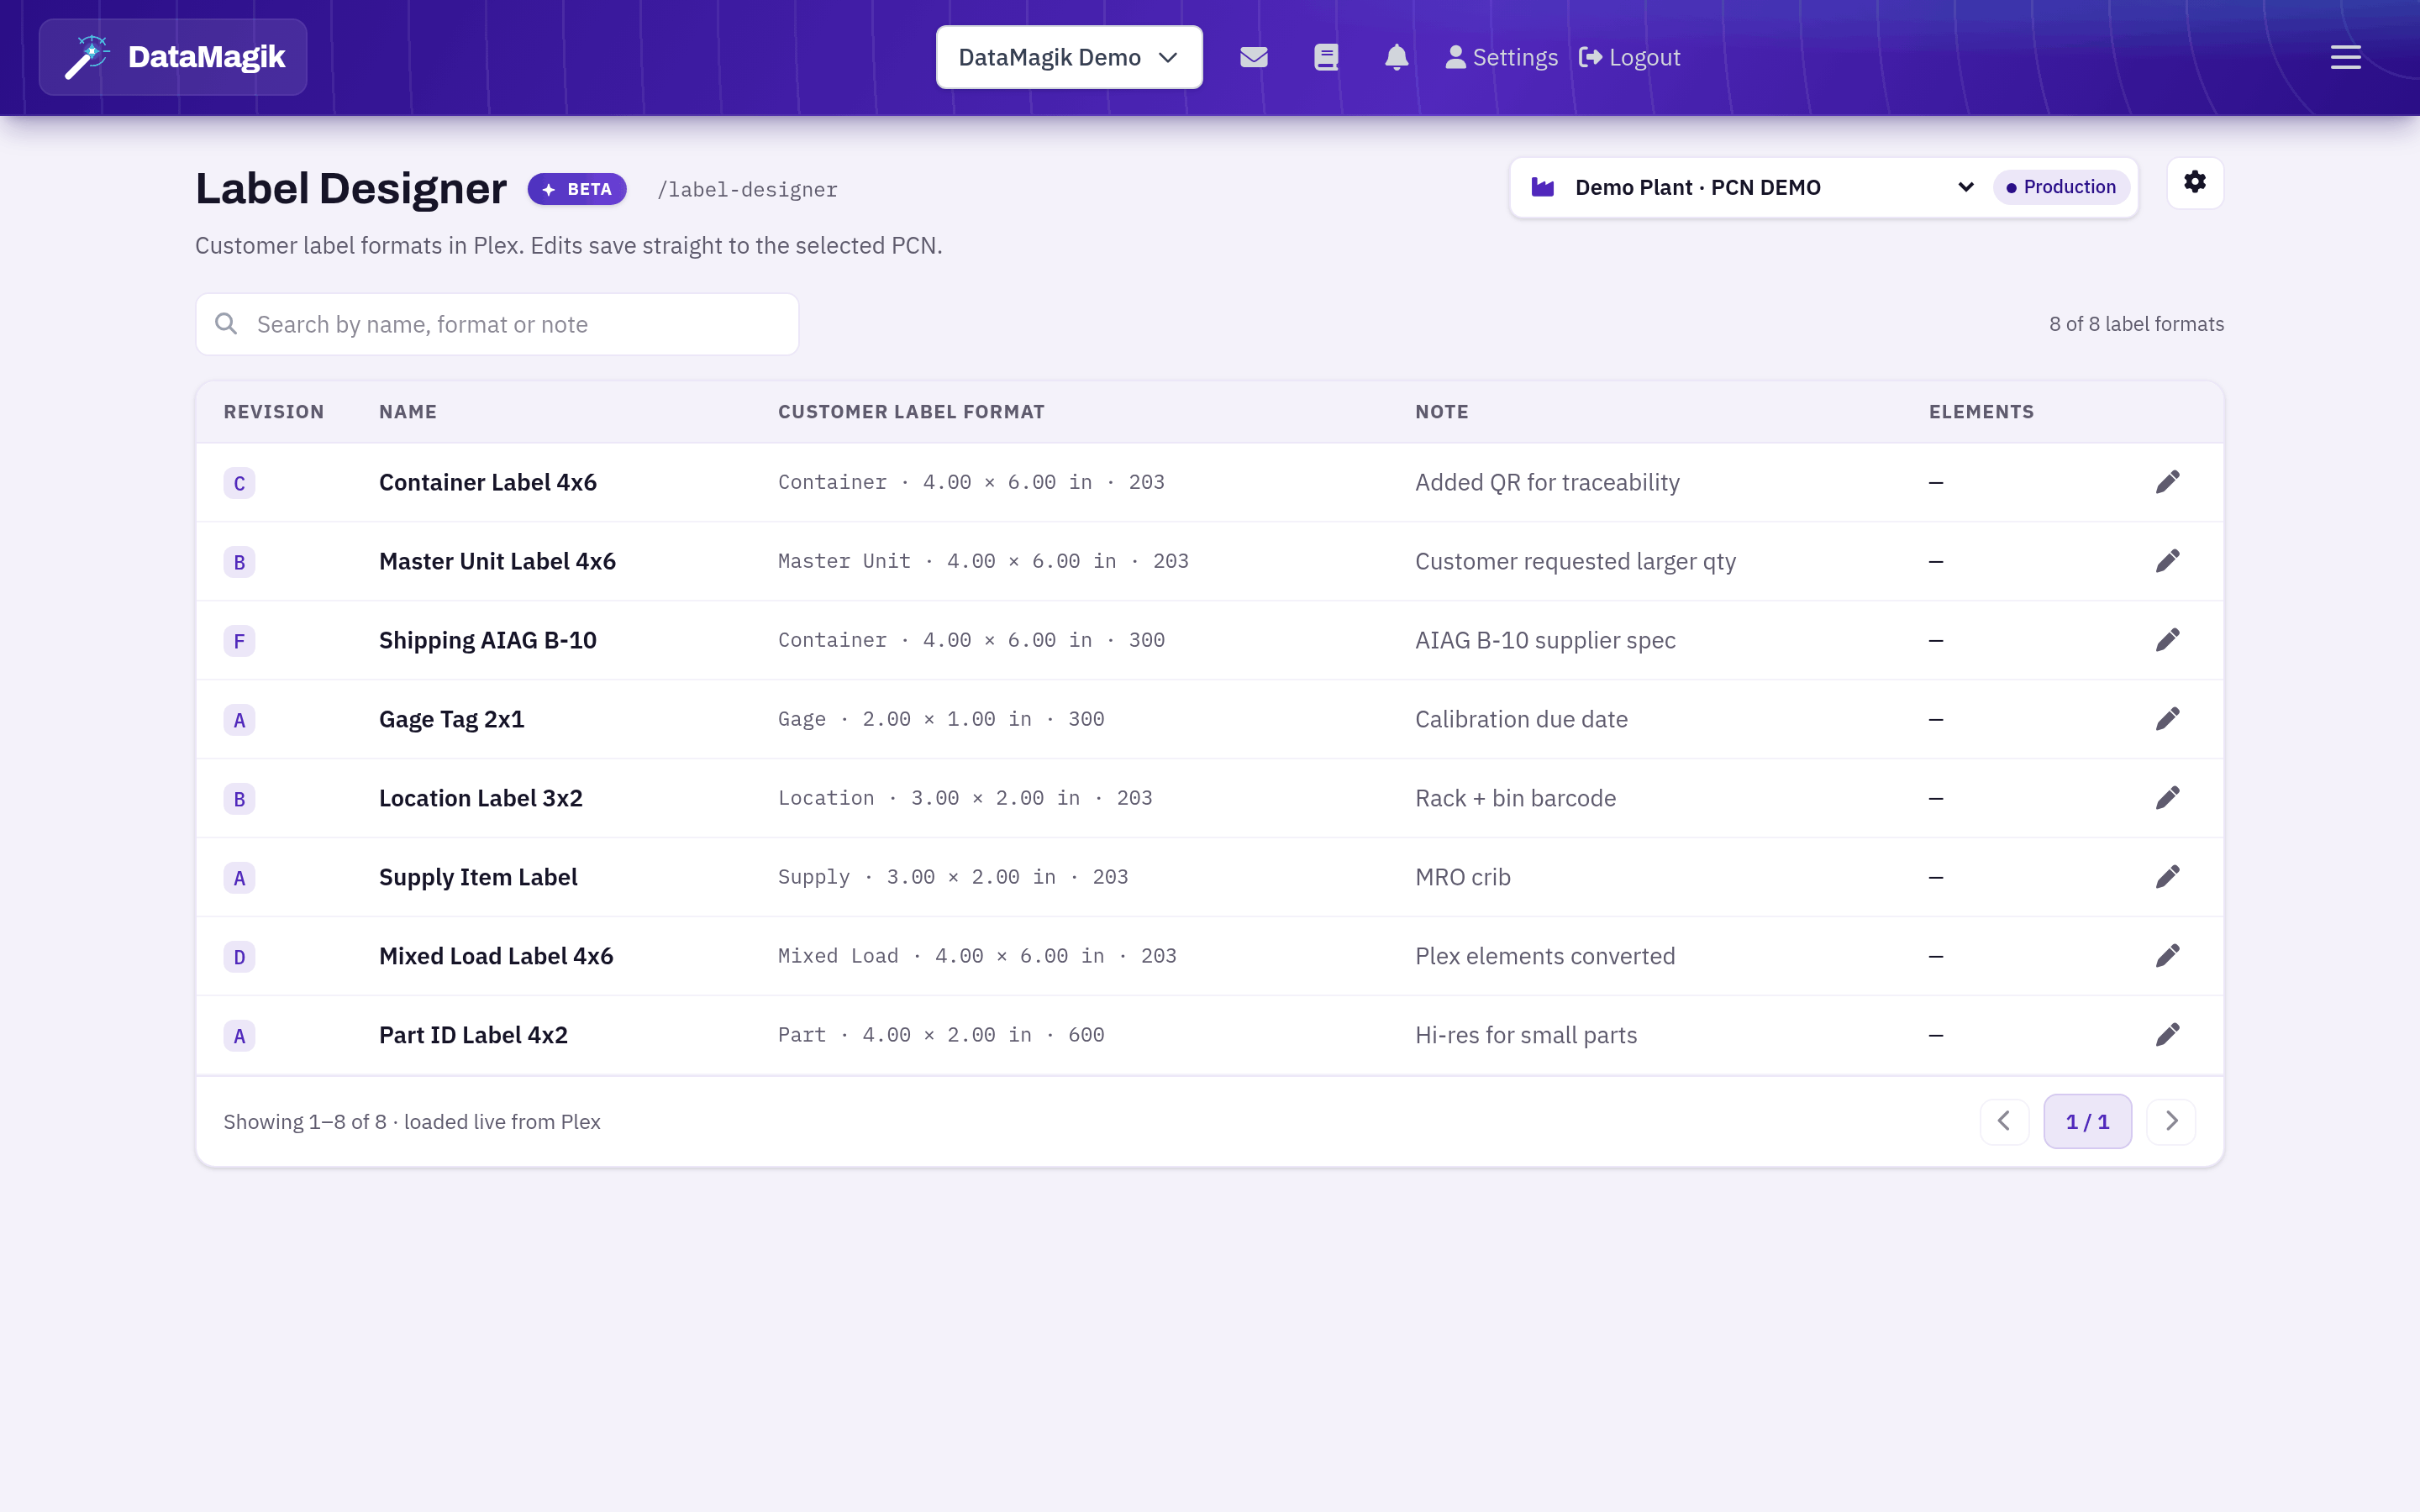
Documents → Label Designer lists the customer label formats in the PCN chosen at the top of the page. Search by name, then select a label to open it in the editor.
The editor
- Toolbar — add Text, Text Block, Line, Box, Barcode or Image; duplicate, delete and rotate the selection; toggle Sample values, Grid and Snap; zoom and Fit.
- Left pane — Elements lists everything on the label; Data sources and Part attrs list the Plex fields you can bind.
- Canvas — drag to move, use the handles to resize, Space + drag to pan. Rulers are in inches; positions and sizes are in millimetres.
- Right pane — the selected element's properties. With nothing selected it shows the label itself: name, revision, note, width, height, copies and printer resolution (200, 300 or 600 dpi).
Positions and sizes are stored with at most two decimal places. Undo and redo cover every change until you save.
Barcodes as they print
The canvas draws each barcode at the size and position the printer will produce: the human-readable line under linear barcodes, and QR and Data Matrix codes at their true printed size. QR and Data Matrix sizes come from their attributes (for example QR magnification) in the property panel, which also shows the printed size — for example "Prints 18.1 × 18.1 mm · QR v3".
Bind elements to Plex data
Each text or barcode element prints a value built from one or more element data rows, in order: fixed text, a column from a label data source, or a part attribute, each with optional Upper case, Bold and Inverse flags.
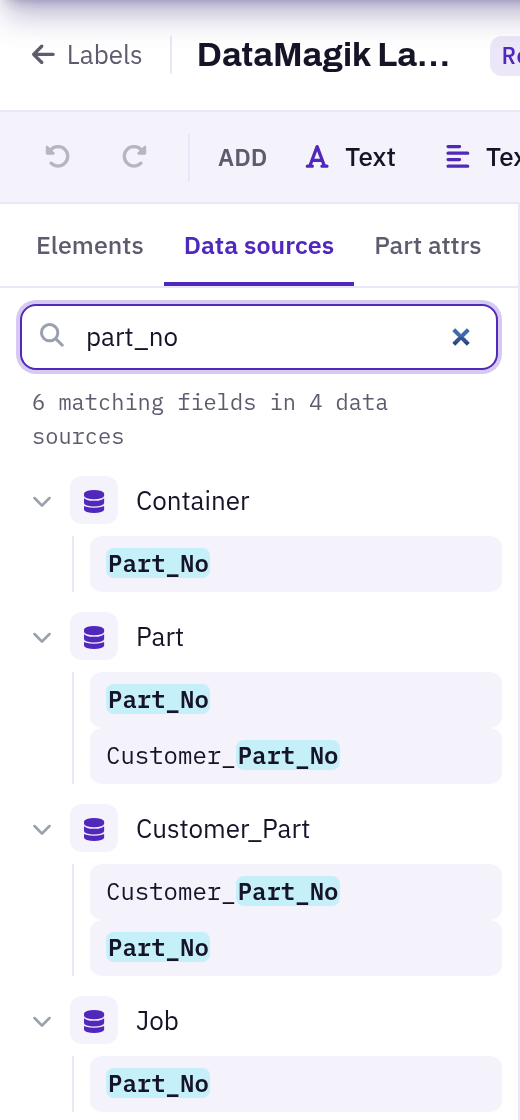
- Open the Data sources tab, expand a data source, then drag a column onto an element — or double-click it to add it to the selected element.
- Don't know which data source has the field? Type in the search box at the top of the Data sources tab, for example
part_no. DataMagik searches every label data source and highlights the matching fields. - Use the Part attrs tab the same way for part attributes.
- To put text on two lines, type
\&where the line should break — for examplePART NO\&(P).
Preview with sample values
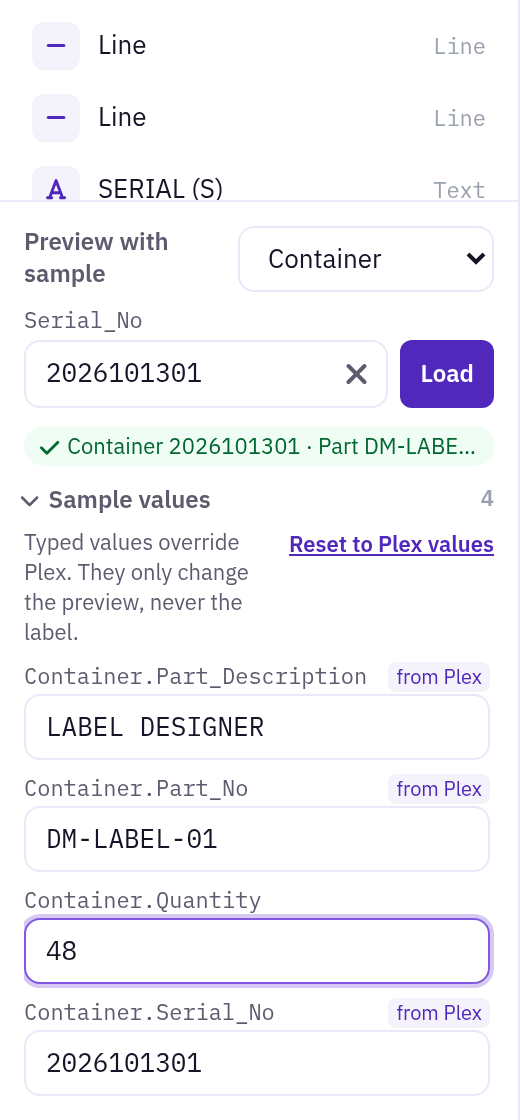
Under Preview with sample (bottom of the left pane), pick the label type and type the record you want to see — a container's Serial_No, a master unit number, a location and so on. Suggestions come from Plex as you type; press Enter or Load.
The Sample values panel then lists every field the label prints. Values Plex returned are tagged from Plex; type a value into any field to fill the rest or override one. The canvas, the preview and the checks all use these values. Reset to Plex values clears what you typed. Sample values never change the label itself, and DataMagik remembers them the next time you open it.
Checks
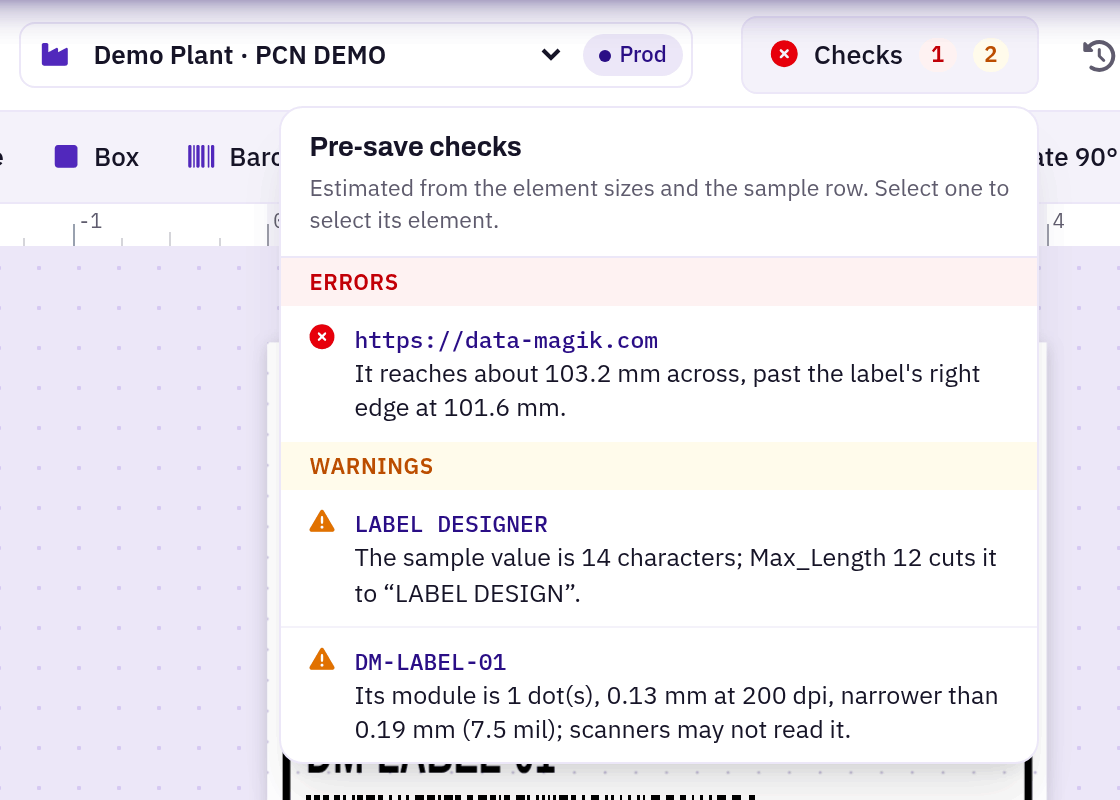
The Checks badge in the header updates as you edit. Select it to see the findings; select a finding to select its element.
- Errors — an element starts off the label, a UPC-A value is the wrong length, a barcode value is longer than it can hold, or an element uses a data source column that no longer exists.
- Warnings — an element runs past the label edge, two elements overlap, a line crosses a barcode, a value will be cut off by its maximum length, a barcode's bars are too thin to scan reliably at this resolution, a part attribute is unknown, or an element has no data.